Главная
»
Figure 8 Knot
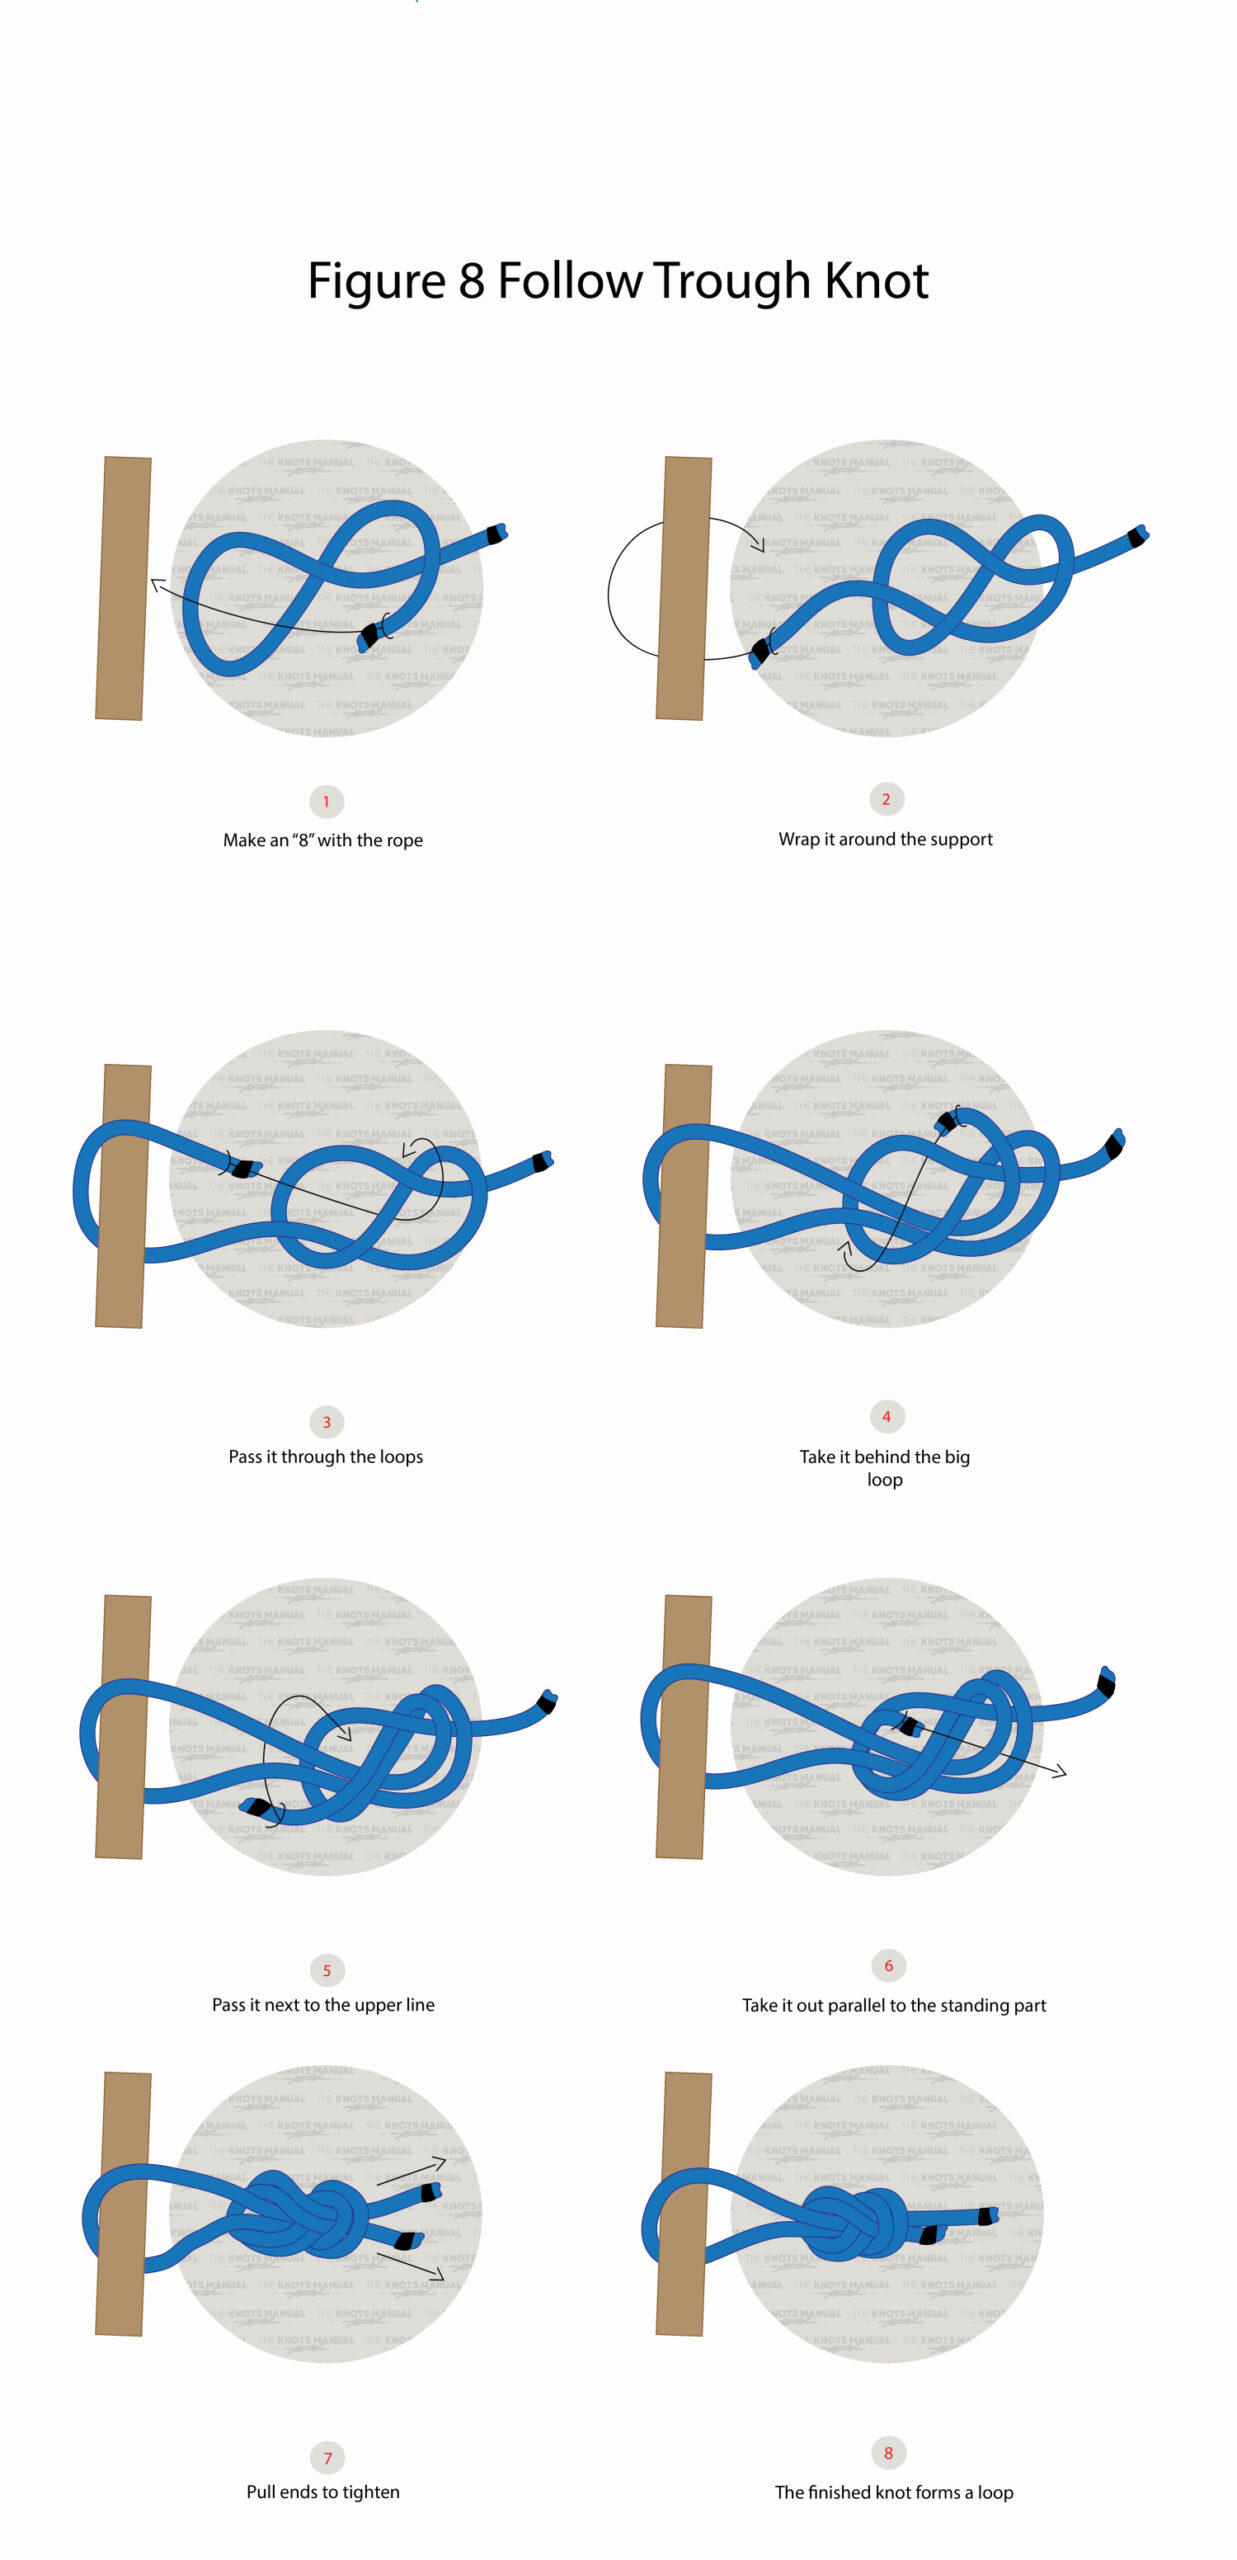
Figure 8 Follow Through Knot: Step-By-Step Guide